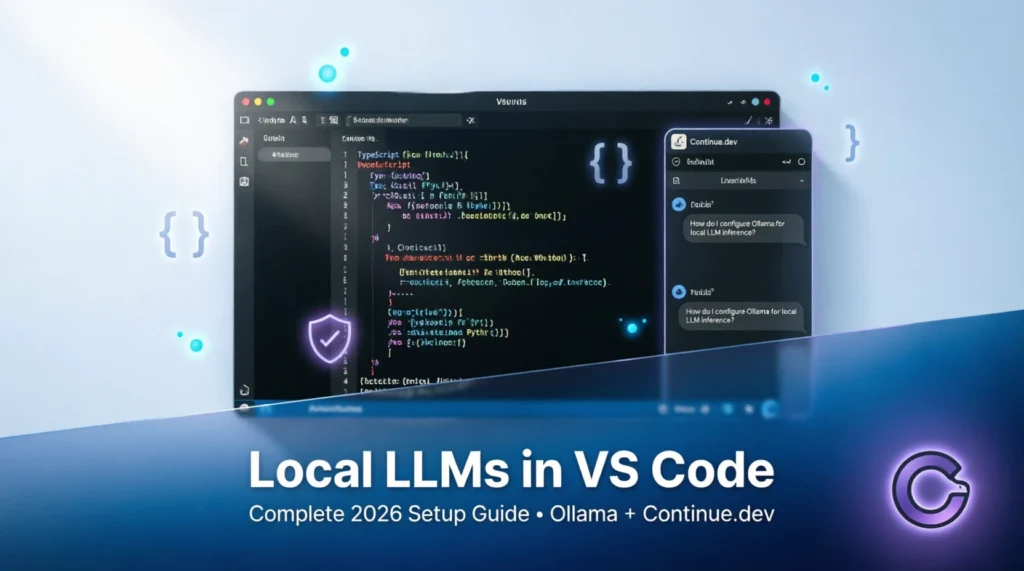
How to Use Local LLMs with VS Code in 2026 (Complete Step-by-Step Guide)
Meta Description: Learn how to connect Ollama, LM Studio, or any local LLM to VS Code for powerful AI coding assistance. Full setup guide for Continue.dev, GitHub Copilot alternative, and more.
Introduction: Why Local LLMs Are Changing the VS Code Game
If you’ve been coding with AI assistance over the last couple of years, you’ve probably felt the tension: GitHub Copilot is amazing, but that $10–20/month subscription adds up. Cloud-based LLMs are powerful, but sending your proprietary code to external servers raises legitimate privacy concerns. And let’s be honest—sometimes you just want to code offline on a flight, in a coffee shop with spotty Wi-Fi, or in a secure enterprise environment.
That’s exactly why more developers are switching to local LLMs with VS Code in 2026. Running large language models directly on your machine isn’t just a niche hobbyist project anymore—it’s a practical, production-ready workflow that gives you privacy, unlimited usage, zero token costs, and full customization over your AI pair programmer.
Imagine this: you’re refactoring a complex module, and instead of waiting for a cloud API to respond (or hitting a rate limit), your local model instantly suggests improvements, explains legacy code, or generates unit tests—all while your code never leaves your laptop. No subscription fees. No usage caps. No data leaving your machine.
In this comprehensive guide, you’ll learn exactly how to use local LLMs with VS Code, step by step. We’ll cover:
- Setting up Ollama (the easiest local LLM runner) on Windows, macOS, and Linux
- Installing and configuring Continue.dev—the most powerful open-source VS Code extension for local AI
- Alternative methods using the official VS Code Ollama extension, LM Studio, Tabby, and Aider
- Pro workflows for prompting, context management, and multi-file editing
- Advanced features like custom rules, codebase indexing, and hybrid cloud/local setups
- Troubleshooting tips and performance optimization tricks
Whether you’re a junior developer just discovering AI pair programming or a senior engineer building secure, offline-capable tooling, this tutorial has you covered. By the end, you’ll have a fully functional, privacy-first AI coding assistant running locally in VS Code—and you’ll understand how to tweak it for your specific workflow.
Let’s dive in and get your local LLM-powered VS Code environment up and running.
Prerequisites: What You Need Before You Start
Before we jump into installation, let’s make sure your system is ready. Running local LLMs doesn’t require a supercomputer anymore, but having the right hardware makes a huge difference in responsiveness.
Hardware Recommendations (2026 Edition)
- Minimum: 16GB RAM, 4-core CPU, integrated graphics (for 7B parameter models at slower speeds)
- Recommended: 32GB+ RAM, 8-core CPU, dedicated GPU with 8GB+ VRAM (NVIDIA RTX 3060 or better, or Apple M2/M3 with 16GB+ unified memory)
- Ideal: 64GB RAM, NVIDIA RTX 4090 or Mac Studio M2 Ultra (for running 70B models or multiple models simultaneously)
💡 Pro Tip: If you’re on a budget, start with a quantized 7B or 14B model like
llama3.2:3bormistral:7b-instruct-q4_K_M. These run surprisingly well on modest hardware and are perfect for code assistance tasks.
Software Requirements
- VS Code (latest stable version from code.visualstudio.com)
- Ollama (our recommended local LLM runner—free, open-source, and cross-platform)
- Git (for cloning repos and managing codebase context)
Installing Ollama (The Foundation)
Ollama makes running local LLMs trivial. Here’s how to install it:
macOS or Linux:
curl -fsSL https://ollama.com/install.sh | shWindows:
- Download the installer from ollama.com/download
- Run the
.exefile and follow the prompts - Restart your terminal after installation
Once installed, verify it’s working:
ollama --versionThen pull your first code-focused model:
ollama pull llama3.2:3b-instruct-q4_K_M🎯 Why this model? Meta’s Llama 3.2 3B Instruct is optimized for instruction following, has strong code capabilities, and the Q4_K_M quantization offers the best speed/accuracy balance for local use.
You now have the foundation. Let’s connect it to VS Code.
Method 1: Using Continue.dev (Best Overall Integration)
Continue.dev is the gold standard for local LLM VS Code integration in 2026. It’s open-source, highly customizable, and supports Ollama, LM Studio, and even remote APIs—all within a single, polished interface.
Step 1: Install the Continue Extension
- Open VS Code
- Press
Ctrl+Shift+X(orCmd+Shift+Xon Mac) to open the Extensions panel - Search for “Continue”
- Install the extension by Continue (publisher:
Continue) - Reload VS Code when prompted
[Screenshot description: VS Code Extensions panel showing “Continue” extension with 500k+ installs, 4.8-star rating]
Step 2: Configure Continue for Ollama
Continue uses a config.json file for all settings. Let’s set it up for Ollama:
- Press
Ctrl+Shift+P→ type “Continue: Open Config” → hit Enter - Replace the default config with this Ollama-optimized setup:
{
  "models": [
    {
      "title": "Llama 3.2 3B",
      "provider": "ollama",
      "model": "llama3.2:3b-instruct-q4_K_M",
      "apiBase": "http://localhost:11434"
    }
  ],
  "tabAutocompleteModel": {
    "title": "Llama 3.2 3B",
    "provider": "ollama",
    "model": "llama3.2:3b-instruct-q4_K_M",
    "apiBase": "http://localhost:11434"
  },
  "systemMessage": "You are an expert software engineer. Provide concise, accurate, production-ready code. Always explain complex logic briefly.",
  "temperature": 0.2,
  "contextLength": 8192,
  "rules": [
    "Prefer TypeScript over JavaScript when possible",
    "Add JSDoc comments for public functions",
    "Suggest unit tests for new logic"
  ]
}
Step 3: Understanding Key Config Options
models: Your chat/completion models. Add multiple entries to switch between models instantly.tabAutocompleteModel: Dedicated model for inline suggestions (faster, smaller models work best here).systemMessage: Sets the AI’s behavior. Customize this to match your team’s coding standards.temperature: Lower values (0.1–0.3) = more deterministic, better for code. Higher = more creative.contextLength: Max tokens the model can “see”. 8192 is safe for most 7B–14B models.rules: Custom instructions the AI follows every time. Incredibly powerful for team consistency.
Step 4: Basic Workflow & Keyboard Shortcuts
Once configured, Continue integrates seamlessly:
- Chat Panel:
Ctrl+L(orCmd+L) to open the Continue sidebar - Inline Edit: Highlight code →
Ctrl+I→ type your instruction (e.g., “add error handling”) - Tab Autocomplete: Just start typing—Continue suggests completions like Copilot
- Explain Code: Highlight →
Ctrl+Shift+L→ “Explain this” - Generate Tests: Highlight a function →
Ctrl+I→ “write Jest tests for this”
[Screenshot description: VS Code with Continue sidebar open, showing chat history with code suggestions and a highlighted function being edited inline]
Step 5: Advanced Setup—Multiple Models & Context
Want to use a small model for autocomplete and a larger one for complex reasoning? Add both to your config:
"models": [
  {
    "title": "Fast Autocomplete",
    "provider": "ollama",
    "model": "llama3.2:3b-instruct-q4_K_M",
    "apiBase": "http://localhost:11434"
  },
  {
    "title": "Deep Reasoning",
    "provider": "ollama",
    "model": "codellama:13b-instruct-q4_K_M",
    "apiBase": "http://localhost:11434"
  }
]
Now you can switch models in the chat dropdown or assign specific tasks to each.
Pro Context Tip: Continue automatically indexes your open files and recent edits. To manually add context:
- Type
@filein chat to reference a specific file - Use
@folderto include an entire directory - Press
Ctrl+Enterin chat to force re-indexing after major changes
Method 2: VS Code Ollama Extension (Lightweight Alternative)
If you want something simpler than Continue, the official Ollama extension for VS Code offers basic chat and completion without extra configuration.
Installation & Setup
- In VS Code Extensions, search for “Ollama”
- Install “Ollama” by Ollama (publisher:
ollama) - Ensure Ollama is running locally (
ollama serve) - The extension auto-detects
localhost:11434
Usage
- Open Command Palette (
Ctrl+Shift+P) → “Ollama: Chat” - Select your pulled model
- Start asking questions or requesting code
[Screenshot description: Minimal Ollama chat interface in VS Code sidebar with a simple query and code response]
Pros & Cons
✅ Pros:
- Zero config required
- Lightweight, no extra dependencies
- Good for quick experiments
❌ Cons:
- No inline editing or tab autocomplete
- Limited context management
- No custom rules or advanced prompting
Best for: Developers who want basic local LLM chat without the complexity of Continue. For serious coding workflows, stick with Method 1.
Method 3: Other Options (LM Studio, Tabby, Aider)
LM Studio + Continue
LM Studio offers a polished GUI for managing local models. To use it with Continue:
- In LM Studio, start the local server (Settings → Local Server)
- In Continue’s
config.json, set provider to"openai"andapiBasetohttp://localhost:1234/v1 - Use any model loaded in LM Studio
Tabby
Tabby is a self-hosted, Copilot-like alternative focused on autocomplete. It requires more setup (Docker, model conversion) but offers enterprise-grade features. Best for teams needing on-prem AI.
Aider (CLI Pair Programmer)
Aider works in your terminal and edits files directly. Great for Git-heavy workflows:
pip install aider-chat
aider --model ollama/llama3.2:3b-instruct-q4_K_M
Quick Comparison Table
| Tool | Best For | Setup Difficulty | Inline Edit | Tab Complete | Multi-Model |
|---|---|---|---|---|---|
| Continue.dev + Ollama | Most developers | Easy | ✅ | ✅ | ✅ |
| VS Code Ollama Extension | Quick chat | Very Easy | ❌ | ❌ | ❌ |
| LM Studio + Continue | GUI model management | Medium | ✅ | ✅ | ✅ |
| Tabby | Enterprise autocomplete | Hard | ❌ | ✅ | ⚠️ |
| Aider | Terminal/Git workflows | Medium | ✅ (CLI) | ❌ | ✅ |
Best Practices & Pro Workflow for Local LLM Coding
Now that your setup is ready, let’s optimize how you use your local AI assistant.
Effective Prompting for Code Generation
Local models benefit from clear, structured prompts. Instead of:
“Fix this function”
Try:
“Refactor this Python function to handle None inputs gracefully. Add type hints and a docstring. Keep the same logic.”
Prompt Template for Complex Tasks:
[Role] You are a senior [language] engineer.
[Task] [Specific action]
[Constraints] [Performance, style, dependencies]
[Output Format] [Code only / with explanation / tests included]
Chat vs. Inline Editing: When to Use Which
- Use Chat (
Ctrl+L) for: - Explaining unfamiliar code
- Brainstorming architecture
- Debugging strategy discussions
- Use Inline Edit (
Ctrl+I) for: - Small refactors
- Adding comments or types
- Generating boilerplate
Multi-File Editing & Refactoring
Continue can reference multiple files via @file or @folder. Example workflow:
- Open
auth.tsanduserController.ts - In chat: “Update the login flow in @auth.ts to use the new validator from @userController.ts”
- Review the suggested changes across both files before accepting
Context Management Tips
Local models have limited context windows. Maximize relevance:
- Close unrelated tabs before complex queries
- Use
@fileto explicitly include only necessary files - For large codebases, create a
CONTEXT.mdfile summarizing architecture—reference it with@CONTEXT.md
Testing Your AI-Generated Code
Never blindly trust AI output. Always:
- Review generated code for security issues (e.g., SQL injection)
- Run linters and type checkers
- Add the generated code to your test suite immediately
Advanced Features: Unlocking Full Potential
Custom Rules & Codebase Indexing
Continue’s rules array isn’t just for style—it can enforce security policies:
"rules": [
  "Never use eval() or innerHTML without sanitization",
  "All API calls must include timeout and error handling",
  "Prefer async/await over .then() chains"
]
For codebase indexing, Continue automatically builds a vector index of your project. To force a refresh:
# In VS Code Command Palette
"Continue: Re-index Codebase"
Agents & Autonomous Tasks (Experimental)
Continue supports simple “agent” workflows where the AI can:
- Plan a multi-step refactor
- Execute file edits (with your approval)
- Run terminal commands (in sandboxed mode)
Enable in config:
"experimental": {
  "agentMode": true
}
⚠️ Warning: Only enable agent mode on trusted codebases. Always review changes before committing.
Using Multiple Models Together
Combine strengths:
- Small model (
llama3.2:3b) for fast autocomplete - Medium model (
codellama:13b) for chat and refactoring - Large model (
mixtral:8x7b) for complex architecture questions (if your hardware allows)
Switch models in the chat dropdown or assign by task in config.
Hybrid Setup: Local + GitHub Copilot
Yes, you can use both! Configure Continue for local models and keep Copilot for cloud-heavy tasks:
- Keep GitHub Copilot extension enabled
- In Continue config, set local models as default
- Use Copilot for:
- Very large context needs (>32k tokens)
- Cutting-edge models not available locally
- Use Continue for:
- Private code
- Offline work
- Cost-sensitive projects
This gives you the best of both worlds.
Troubleshooting Common Issues
“Ollama connection refused”
- Ensure Ollama is running:
ollama serve - Check firewall settings (allow port 11434)
- Verify
apiBasein config matches Ollama’s address
Slow Responses or High Memory Usage
- Switch to a smaller quantized model (
:q4_K_Mor:q3_K_S) - Reduce
contextLengthin config (try 4096) - Close unused VS Code windows and browser tabs to free RAM
Poor Code Quality or Hallucinations
- Lower
temperatureto 0.1–0.2 for more deterministic output - Improve your system prompt with explicit constraints
- Add more specific rules in the
rulesarray
Continue Extension Not Loading Config
- Check JSON syntax in
config.json(use VS Code’s JSON validator) - Reload VS Code after saving config changes
- View logs:
Ctrl+Shift+P→ “Continue: View Logs”
Model Not Found Errors
- Pull the model first:
ollama pull your-model-name - Verify model name spelling in config (case-sensitive)
- List available models:
ollama list
Performance Optimization Tips
Get the most speed from your local LLM setup:
Model Selection Strategy
- Autocomplete: Use 3B–7B quantized models (
q4_K_M) - Chat/Refactoring: 7B–14B models with
q4_K_Morq5_K_M - Complex Reasoning: Only use 20B+ models if you have 32GB+ RAM
Ollama Runtime Tweaks
Edit ~/.ollama/config.json (create if missing):
{
  "num_gpu": 1,
  "num_thread": 8,
  "main_gpu": 0
}num_gpu: Number of GPU layers to offload (higher = faster, but uses more VRAM)num_thread: CPU threads for inference (match your core count)
VS Code Settings for Snappier AI
Add to your settings.json:
{
  "continue.enableTabAutocomplete": true,
  "continue.autocompleteDelay": 100,
  "editor.quickSuggestions": {
    "other": "on",
    "comments": "off",
    "strings": "off"
  }
}
Hardware-Specific Advice
- Apple Silicon: Use
--gpuflag with Ollama for Metal acceleration - NVIDIA: Ensure CUDA drivers are up to date; Ollama auto-detects
- AMD ROCm: Use the ROCm-enabled Ollama build for Radeon GPUs
Conclusion + Next Steps
Congratulations—you now have a powerful, privacy-first AI coding assistant running locally in VS Code! By following this guide, you’ve set up Ollama, configured Continue.dev, and learned pro workflows that rival (or exceed) cloud-based alternatives—without monthly fees or data privacy concerns.
Your immediate next steps:
- ✅ Pull a code-optimized model:
ollama pull codellama:7b-instruct-q4_K_M - ✅ Customize Continue’s
rulesto match your team’s style guide - ✅ Try one inline edit (
Ctrl+I) and one chat query (Ctrl+L) today - ✅ Share this setup with your team—local LLMs are a force multiplier
Where to go from here:
- Explore Continue’s documentation: continue.dev/docs
- Join the Ollama Discord for model recommendations
- Experiment with fine-tuning small models on your codebase (advanced)
- Contribute to open-source local AI tools—you’re now part of the community
The future of AI-assisted development isn’t just in the cloud—it’s on your machine, under your control. By learning how to use local LLMs with VS Code, you’ve future-proofed your workflow, protected your code, and unlocked unlimited AI assistance. Now go build something amazing.
Happy coding! 🚀
FAQ: Local LLMs with VS Code
Q1: Do I need a powerful GPU to run local LLMs in VS Code?
A: Not necessarily. Quantized 3B–7B models run well on modern CPUs with 16GB RAM. A GPU (8GB+ VRAM) significantly speeds up inference but isn’t required for basic code assistance.
Q2: Can I use local LLMs completely offline?
A: Yes! Once you’ve pulled your models with Ollama (ollama pull), everything runs locally. No internet connection needed for inference—perfect for air-gapped environments.
Q3: How do I update my local models?
A: Run ollama pull <model-name> again to fetch the latest version. Ollama handles versioning automatically. You can also list models with ollama list and remove old ones with ollama rm.
Q4: Is Continue.dev safe for proprietary code?
A: Absolutely. Continue.dev is open-source (Apache 2.0), and when configured with Ollama or LM Studio, all processing happens on your machine. Your code never leaves your computer.
Q5: Can I use multiple local LLMs at once?
A: Yes! Add multiple models to Continue’s config.json under the models array. You can switch between them in the chat UI or assign specific tasks to each model.
Q6: How does local LLM performance compare to GitHub Copilot?
A: For autocomplete, small local models are nearly as fast as Copilot. For complex reasoning, cloud models may still have an edge—but local models are catching up fast, especially with 2026’s optimized architectures like Llama 3.2 and CodeLlama 2.
Q7: What’s the best local LLM for coding in 2026?
A: Top picks:
- Lightweight:
llama3.2:3b-instruct-q4_K_M(fast, great for autocomplete) - Balanced:
codellama:13b-instruct-q4_K_M(strong code understanding) - Power User:
mixtral:8x7b-instruct-v0.1-q4_K_M(if you have 32GB+ RAM)
Q8: How do I contribute to or get help with these tools?
A:
- Continue.dev: GitHub Issues & Discord (github.com/continuedev/continue)
- Ollama: GitHub & Community Forum (github.com/ollama/ollama)
- General Tips: Search r/LocalLLaMA on Reddit for community workflows and model recommendations